TrustedBarber is reader-supported. If you buy through links on this page, we may earn a commission from Amazon at no extra cost to you.
- The brief: a classic pompadour, not too short
- The square foundation
- The taper: same look, three names
- Scissor over comb: connecting sides and top
- Scissors, clippers and razor: the three-tool shop
- Cutting the top: crown forward, quarter-inch sections
- Point cutting and deep point cutting
- The blowout: setting the roots
- The finish: product and the clean part
- The tools for the build
- FAQ
The pompadour has a reputation as a styling showpiece, and that reputation hides how structured the cut itself is. Award-winning barber MC Barber builds one on camera in this tutorial, and his version is deliberately conservative: a classic pompadour with one and a half on the sides, not too short. His process starts before any tool touches hair, because he divides the hair and styles it the way he wants the haircut to end up, and only then removes the excess. That ordering, style first and cut second, is what keeps the volume aimed at the front where a pompadour needs it, instead of discovering after the cut that the weight sits in the wrong place.
The brief: a classic pompadour, not too short
The length decision frames everything. The haircut stays pretty short overall, down to one and a half on the sides, but MC is explicit that he does not want to go too short. This is the classic salon version of the cut, where you do not do a lot of fading; you do one size and stay at that. The distinction matters for anyone requesting the cut: a pompadour with a hard skin fade underneath is a modern hybrid, while the version in this video keeps a visible length on the sides so the top reads against a tapered, not shaved, base.
The payoff he names at the end is speed and reliability: the haircut takes about 15 minutes, and it is simple to do. That speed comes directly from the conservative length. Fewer guard transitions, fewer blending passes, more of the work happening in one pass per zone.
One and a half on the sides, but do not go too short: this is the classic salon version.
The square foundation
His first step is removing the length and bulk, and the way he does it contains the video’s central idea. He runs one and a half on the sides, but he is creating a square shape: even though the guard is set, he elevates the clippers as he goes up and does not follow the contour of the head, doing a little freehanding here and there. The result is hair left longer as he works up, so from the bottom toward the heavy line at the top the length climbs, and by that line he estimates the hair is about a three. He starts at one and a half and ends up at about three to three and a half.
The square shape is not an aesthetic flourish. He calls it the ideal shape for men’s hairstyles and says that this foundation is really half of your job done once you can master it. A square side profile feeds the pompadour directly: the stacked length going up the side wall gives the top’s front volume something to lift against. Cut the sides to follow the head’s natural curve and the top fights a rounded base, which is why so many home pompadours collapse at the front instead of standing.
If you want the guard ladder behind those numbers, our clipper guard sizes guide covers what one and a half actually leaves on the head, and why the three-to-three-and-a-half zone at the top of the side wall is the blending ceiling for this cut.
Square shape, not round: elevated sections over the guard are what build it.
The taper: same look, three names
Next he tapers the back, and pauses on vocabulary that genuinely confuses clients: depending where you are, some salons call it a blowout, others a New York fade, others just the taper. It is a taper look whichever word follows it. On this cut he is using one sixteenth of an inch at the neck, again not going too short, keeping the haircut short but not too short.
For the ask, that means you can request this pompadour using any of the three names and land on the same base: a clean taper at the back and sides that keeps length everywhere else. Our step-by-step taper guide covers the technique in isolation, since it is the one part of this build that works on nearly every short men’s haircut.
Blowout, New York fade, taper: three names, one look.
Scissor over comb: connecting sides and top
With the bulk out and the taper set, the connection work happens with scissors over comb, which joins the sides and the top. This is the step that turns three separate jobs into one haircut. The one-and-a-half side wall ends at a certain height, the top has its own length targets, and the band between them has to graduate from one to the other without a shelf. Get this zone wrong and the cut reads as a flat top with extra steps; get it right and the eye travels from the taper up into the front lift without catching anywhere.
Scissor over comb is the right tool for that band because it cuts to the comb’s angle rather than to a guard’s fixed length, which is exactly what a graduated zone needs. Our clipper over comb technique guide covers the clipper-side version of the same move if scissors are not yet in your hand rotation; the geometry of holding the comb and reading the taper is shared between the two.
Scissor over comb is what turns three separate jobs into one haircut.
Scissors, clippers and razor: the three-tool shop
Midway through the build, MC zooms out to the system he developed over years: equally use scissors, clippers and a straight edge razor. In his system, clippers rarely touch the top; they work the sides only, and the top is done with scissors or a straight edge razor. He contrasts that with the current market: a lot of barbershops these days do mostly just clipper work, whether on the sides or the top, while salons mostly use scissors.
His argument for the middle path is a business argument as much as a craft one: if you want to separate yourself from everyone else, learn scissors, the straight edge razor, and blow drying and styling techniques, and you can offer both a salon hairstyle and a barbershop hairstyle from the same chair. For a client, that translates into a practical vetting question when choosing who cuts your pompadour: a barber who cuts tops with shears rather than running a guard over them will build a softer, more tailored crown, which is what this classic version needs.
Clippers work the sides only. Scissors and razor own the top.
Cutting the top: crown forward, quarter-inch sections
When it comes to the top, MC starts cutting from the crown going forwards, taking about quarter-inch sections and following his guide as he comes toward the front. The directional detail that matters is the over-direction: he slightly over-directs going forward so the front can stay slightly longer. Cutting crown to front while pulling each section slightly forward deposits length at the hairline, which is precisely where a pompadour collects its mass for the lift.
 ” alt=”Three hair styling tins and jars on a barbershop counter” class=”wp-image-7013″ style=”width:640px;height:auto” />
The section size is doing real work too. Quarter-inch sections on the top mean each cut line is verified against the guide before another layer covers it, so an error never compounds through more than one section. Bigger sections cut faster and correct worse, which is why the 15-minute total still holds: small sections with no rework beat big sections with fixes.
Crown forward, quarter-inch sections, slight over-direction for the front.
Point cutting and deep point cutting
Texture on this cut comes entirely from scissors, and MC names two depths of the same technique. He does point cutting, and for more texture he does deep point cutting, which he describes as slightly different from regular point cutting: it removes the weight and creates the texture inside the hair.
That weight-removal detail is what keeps a classic pompadour wearable. Point cutting softens the perimeter line of each section; deep point cutting reaches into the section and takes bulk out of the interior, which lets the hair stack at the front without feeling dense. A pompadour cut blunt across the top can look heavy even when the shape is right, and this is the move that fixes it. For the scissor technique in detail, our thinning shears technique guide covers the texturizing moves barbers use when the bulk problem shows up mid-cut.
Point cutting for texture, deep point cutting for more.
The blowout: setting the roots
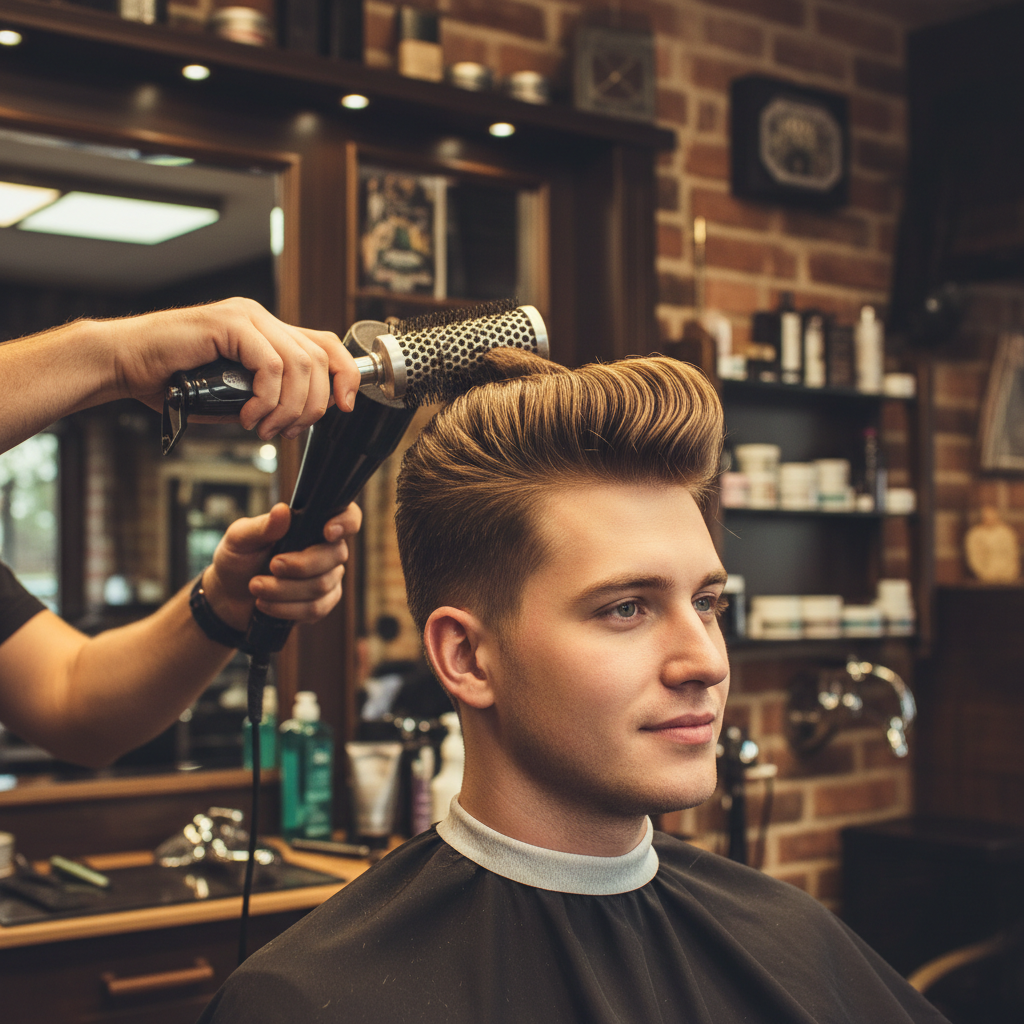
The styling phase starts at the back, as usual, and MC’s first instruction is counterintuitive: try to keep the top flat while blow drying it in the direction you want the style to go. The side sections get raised higher to create volume toward the front, and through all of it he keeps repeating the instruction he cannot stress enough: set the roots. Make sure the roots are dry and create enough volume for the style.
Root-setting is the mechanical secret of a pompadour that stands up without a gallon of product. Hair remembers the direction it dried in, not the direction you combed it after. So the dryer and the brush aim the root while it is wet and hot, and the finished shape holds because the foundation was cast that way. On the part line, he gets a clean line with the brush and blow dryer, setting the roots nice and clean, which is what makes the part read as a line rather than a smudge once product goes in.
The equipment matters here because this is a volume job, not a drying job. A high-wattage dryer with a concentrator nozzle, like the BaBylissPRO Nano Titanium Italian Portofino Hair Dryer, gives the directed heat that root-setting needs, and a vented round brush lifts the section while the heat sets it. If you are building the dryer side of your station, our styling product guide and this dryer pair are the two halves of the finish.
Keep the top flat while you blow dry it in the direction the style goes.
The finish: product and the clean part
For product, MC uses a natural matte cream, and his application method is as specific as the cut itself: applying it evenly through all the hair for the maximum benefit of the product, then combing the hair in the direction you desire. Even distribution before direction, not a dab on top worked in afterward. A pompadour combed after uneven product application separates into clumps; combed after even application, it reads as one controlled shape.
Then the comb does the final architecture. Combing the hair in the desired direction, front and up for the pompadour, sets the finished line, and the clean part holds because the roots were set underneath it. The full sequence, square foundation, taper, scissor-over-comb connection, crown-forward top cut, deep point cutting, root-set blowout, even product, directional combing, is why this 15-minute cut reads like a much more expensive one.
Matte cream applied evenly, then combed into the direction the style lives.
The tools for the build
Styling product
The video’s natural matte cream finish points at the matte, medium-hold corner of the styling shelf. The Layrite Cement Hair Clay sits exactly there: a matte, cement-like hold that keeps the front stacked through the day without shine, and it rinses with water. For a slightly softer, more traditional pomade finish on the same cut, the Reuzel Blue Pomade gives strong hold with a subtle sheen, which reads more vintage.
Dryer and comb
The blowout is half the haircut, so the dryer earns its place in the kit: the BaBylissPRO Portofino at 2,000 watts gives the airflow root-setting needs at a chair-friendly weight. A fine-tooth end on a durable comb makes the clean part, and the Bardeau professional cutting comb covers sectioning, the scissor-over-comb work and the final directional combing in one tool.
FAQ
How long should the sides be for a classic pompadour? In this build, one and a half at the bottom of the side wall, rising to about three to three and a half at the top because the clipper elevates and freehands as it goes up. The result is a tapered, square side rather than a faded one, and that side wall is what the top’s volume lifts against.
Why does the cut hold up without heavy product? Two reasons, both from the video: the roots get set and fully dried during the blowout, so the hair’s foundation points the direction the style needs, and deep point cutting removes interior weight so the front stacks without collapsing under its own density.
Is the front cut shorter or longer? Longer, deliberately. MC works from the crown forward and slightly over-directs each section, so the front stays slightly longer than the crown. That extra length at the hairline is the pompadour’s raw material, and the same over-direction is why the fringe area never looks blunt in this version.
What should I ask for at the shop? A classic pompadour with a one-and-a-half side and a tapered back, cut square rather than following the head’s curve, with the top scissor-cut from the crown forward and texture added by point cutting. Asking for the square foundation and the scissor-cut top signals the version this tutorial builds. If your barber reaches for a guard to cut the top, you are getting the barbershop hybrid, which is a fine haircut but not this one.