
TrustedBarber is reader-supported. If you buy through links on this page, we may earn a commission from Amazon at no extra cost to you.
The faux hawk is the haircut people describe wrong: it is not a mohawk, and it is not a regular short back and sides either. Barber Style Directory put it well in their build video: there are a lot of names for this cut, but at its heart it is a middle ground, sitting between the conservative short cuts and the full mohawk, which is exactly why it goes wrong in home attempts. The middle ground is the hardest place to cut, because the guide lines, the blending and the lever work all have to be more precise than either of the styles it sits between. Their step-by-step, broken down below, is a genuinely repeatable sequence.
What the faux hawk actually is
Before the technique, the definition, because the shape explains every step that follows. A faux hawk keeps the center strip of the head longer and denser, fades the sides down, but does not shave the strip down to skin the way a mohawk does. The look depends on contrast: a dark, controlled center against blended sides, with the length focused up top and behind. That is why every instruction in the video protects either the guideline or the blend, because the contrast is the haircut.
If you want to see where the faux hawk sits in the family, our burst fade guide covers the fade it shares DNA with, and the Edgar cut method shows the other neighbor on the shelf.
The V in the back: reference points first
The build starts at the back of the neck with a V, and the video’s opening point is the most useful lesson in it: the human eye is not 100 percent accurate, so you use reference points instead of trusting your judgment. To find the center of the V, the barber locates the middle of the back of the neck, and the stopping point for each arm of the V is the midpoint of the ear. Those two references turn a wobbly freehand V into something close to symmetric.
They are also honest about a reality every home cutter should hear: when you are cutting from directly behind, the first pass will not be perfectly straight, and that is fine, because it is a rough draft. You come back and correct it at the end. First draft, then refine. That discipline prevents the most common beginner failure, which is over-correcting a line you just cut and going crooked the other way.
Why a V at all, on a cut whose drama lives on top? Because the back is where a faux hawk is judged. The center strip has to taper into the nape, and a straight nape line makes that taper read as a buzz cut with a strip glued on top, while the V keeps the shape pointing up the head, following the same upward direction the styled center pulls toward. The neckline detail is not decoration; it is the last thing anyone sees when you walk away from them.
The arched guideline
With the V established, the sides get their guideline, and it is not a straight line: it is an arch, following the curve of the head. The guideline is made about an inch thick, with the clipper lever fully open, which is the setting that removes the least hair while it establishes the line. Everything below gets taken down; everything above stays protected by that band.
The reason the guideline is an arch rather than straight is the head itself: a straight band across a curved surface leaves uneven gaps at the edges. The arch follows the natural curve so the line stays consistent where it will actually be seen, from the side and behind.
An inch thick with the lever open is also a wider band than most cuts use for a guideline, and that width is a deliberate choice for this style. The faux hawk’s sides need a long, gradual blend to keep the dark center standing against them, and a wide open-lever guideline gives the lower fades more room to work with before they commit to a length. Thin guidelines suit tight fades like skin fades; this build wants the opposite.
Fading up: the guard ladder
Then the fading starts, and the sequence is the same guard ladder that runs through every good fade, executed with specific lever discipline. First the bottom line gets attacked: the barber works the bottom out, then gradually opens the clipper lever, opens it a little more, and keeps blending until the bottom line is essentially erased. The sides get blended a little higher as the work approaches the temple, but with a deliberate constraint: leave that side a little dark. A faux hawk that loses all its darkness on the sides has lost the contrast the center strip needs to read against.
Next comes the one and a half guard, and again the lever leads. He starts with it open, because closing the lever first would cut out too much hair before he can judge how much needs to come off. Seeing it was not taking much off, he closes the lever and goes a little closer, stopping at the parietal ridge, the bony shelf that runs around the head where the side plane turns into the top plane. That ridge is the natural ceiling for this section of the blend; our guard size guide maps the lengths and the zero gap guide covers getting closer without irritation.
Then the one guard, and here the video gives its most repeatable piece of instruction. The one guard pass runs three times in a fixed rhythm: lever totally open, then closed, then halfway. Open, closed, halfway. That rhythm is the whole blend on that guard, and he repeats it aloud because it is the kind of thing you only internalize by hearing it said in order.
The half guard: the mesh point
The half guard gets its own section in the video because its job is different from every other pass. The half guard goes halfway and then closes, and what it does is connect the top of the blend with the bottom of the blend. He calls it the mesh point, and that is exactly the right word: every other guard works a zone, the half guard is the stitch between zones. A faux hawk with a visible seam between the lower and upper blend is a faux hawk with a missing half guard pass.
One more placement note from the video: when he runs the one and a half on the second side, he starts open again and explains the guard’s real value, that you are pretty much not going to blend past that point. The one and a half sets the ceiling of the blend, which means you cannot accidentally raise your guideline by blending too high. Guards as boundaries, not just lengths.
Spot checks, not new guidelines
After the ladder comes the step that separates tidy cuts from good ones, and the video frames it correctly: what you see him doing here is spot work. He saw a few dark spots and touched up the center areas, and he is explicit about the intent: he is not trying to raise the fade or create another guideline, just cleaning up the work. That distinction is the one beginners violate most. A spot check adjusts density inside the existing structure; the moment you start extending upward, you are re-cutting the fade and every line below it is now wrong.
A practical checklist for your own spot pass, built on the same rule. Look for the dark spots in the center of each blend zone, not along the guideline, and fix them with light corner work at the same guard level that zone was cut with. Check the temple area, where blends most often go thin on one side and heavy on the other. Then step back two paces and look at the whole head before touching anything else, because spot work done an inch from the mirror is how lines get raised by accident.
The other side, and the practice note
The second side repeats the same sequence, and the video’s parting advice about practice is worth passing on verbatim: get someone who will let you try the haircut on them, pull up the video, and go step by step. If you do not get every step completely right the first time, do not panic; the more you do the haircut over and over, the better you get it. Their line is practice makes progress, and on a cut this guideline-dependent, that is the honest version of the promise.

They also make the point that motivates their whole channel: the steps are the same on every texture. Straight hair, kinky hair, curly hair, loose or wiry, the sequence holds, because the process is the skill, not the hair. If your first faux hawk on a textured head comes out different from your first on straight hair, the fix is in your execution of the steps, not in the steps.
Styling the finished cut
The haircut is half the product; the styling is the other half, and the faux hawk has a specific recipe. The center strip gets pushed up and slightly back, worked with fingers first so the product distributes through the length rather than coating the surface, then set. The sides get smoothed down with the palm, in the direction of the blend, so they stay quiet under the center. The finish that suits the cut is matte to low shine: high shine on the center strip reads dated, while a dry, textured finish reads modern. Our pomade vs clay vs wax breakdown sorts the options by hold and finish if you want to pick deliberately.
One styling note specific to this cut: the faux hawk is a length-hungry style, and it collapses as the center strip grows. Keep the top worked every two to three weeks if you wear it regularly, because the difference between a faux hawk and messy spiked hair is entirely the discipline of the sides.
The tools for the build
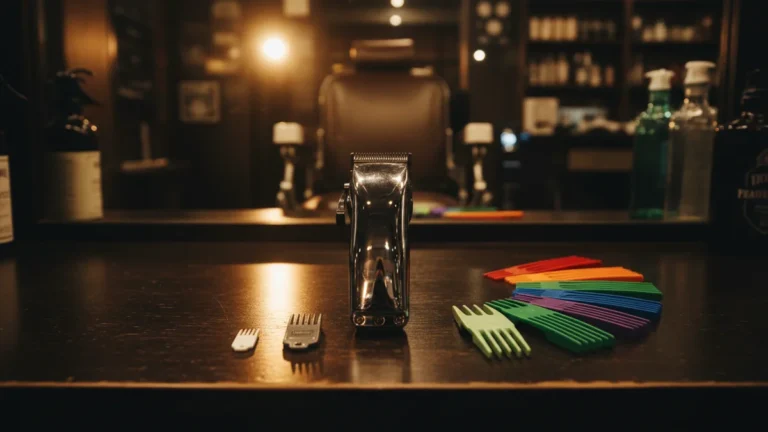
The build runs on three tools, and all three are verified in stock on Amazon right now. Here is the shelf, each one mapped to its job in the sequence.
Wahl Professional 5-Star Magic Clip Cordless
The workhorse for the whole guard ladder. The Wahl 5-Star Magic Clip Cordless carries the staggered-tooth blade that made it the standard for blending passes: the blade feeds hair into the teeth smoothly, which is exactly what the open-closed-halfway rhythm on the one guard needs. Cordless, so you can walk around the head for the arched guideline without a cord dragging through your work.
Andis 04780 T-Outliner
The V and the final edge work belong to a trimmer, and this is the one that lives on professional stations for that job. The Andis 04780 T-Outliner has the carbon steel T-blade and deep-tooth geometry that draw sharp lines through the nape without snagging, and the bump-free cutting action that matters at the neckline, where skin is thinnest. The rough-draft V, then the final pass, both cleanest with a trimmer in hand.
Reuzel Blue Strong Hold Pomade
A faux hawk stands up on its own for about ten minutes, then the product decides what it looks like for the rest of the day. The Reuzel Blue Strong Hold Pomade is the water-based, high-shine, strong-hold classic that pushes the center strip up and keeps the sides pinned down, which is the whole contrast in one gesture. Worked through the center with fingers and finished with a comb at the edges, it holds through a full day and washes out with water.
FAQ
Is a faux hawk just a mohawk with softer sides?
Not quite: it is the middle ground between a burst fade and a mohawk. The center strip stays hair rather than being shaved down to skin, and the sides fade into a blend rather than a hard wall.
How do you get the back V straight?
Reference points, not eyeballing: find the center of the back of the neck, and use the midpoint of each ear as the stopping point for the V’s arms. Do the first pass as a rough draft and correct it at the end.
What is the half guard for?
It is the mesh point: it connects the top of the blend to the bottom of the blend. The one guard rhythm on the video is open, closed, then halfway, and the half guard pass runs halfway and then closes.
Why does the guideline arch?
Because the head is curved. A straight band across a curved surface leaves uneven gaps at the edges, while an arch keeps the line consistent where it will be seen from the side and behind.
How dark should the sides be?
Leave them a little dark. The contrast between the blended sides and the denser center is the haircut; fading the sides too high removes what the faux hawk is built on.
Related reading: clipper over comb technique, best clippers for fades, guard sizes explained, and the pomade vs clay vs wax comparison.