
How to Shape a Beard at Home: The Barber Framework That Gets the Jawline Right
Disclosure: this article contains Amazon affiliate links. As an Amazon Associate we earn from qualifying purchases, at no extra cost to you. It does not change what we recommend.
In this article
- Step Zero: Wash the Beard, Then Decide Nothing Yet
- Map the Neckline First
- Set the Cheek Line With Restraint
- Two-Pass Length Reduction, Not First-Try Hacks
- Finish With Oil, Balm, and a Cold Rinse
- The Three Mistakes That Ruin Good Trims
- Adjustments for Long Beards and Mustaches
- Keeping the Shape Between Trims
Most men shape their beards in the wrong order: they grab a trimmer, chase stray hairs, and hope the jawline looks symmetrical when they are done. Working barbers do it differently, and the difference shows. Suavecito’s “Barber Breakdown: Beard Shaping 101” (watch it here) and Matty Conrad’s beginner beard-trimming session (here) both teach the same core principle from different shops: a good beard shape is mapped out before a single hair is cut. This guide turns that principle into a repeatable at-home framework, with the exact tools that make each step easier and the mistakes that ruin an otherwise good trim.
Step Zero: Wash the Beard, Then Decide Nothing Yet
Every pro starts with a clean, fully dry beard. Wet or damp hair hangs longer than it will sit once dry, so trimming damp is how men end up with beards two weeks shorter than they intended. Wash with a dedicated beard wash rather than hair shampoo, which strips the natural oils your skin needs under the beard. The Suavecito Beard Wash Set pairs an 8-ounce beard wash with a matching conditioner built on avocado oil, shea butter, and olive oil, and it is the cheapest insurance against the itch phase that follows most bad trims.
After washing, comb the entire beard downward with the grain and let it dry completely. Then, and only then, look in the mirror and decide what shape you are heading toward. The two decisions that matter are your cheek line and your neckline, and getting those two lines right is 80 percent of what a barber is actually charging for.
Map the Neckline First
The single most common home-trim mistake is cutting the neckline too high. The correct neckline sits above the Adam’s apple, roughly where your neck curves from vertical to horizontal when you tilt your head back slightly. Everything below that imaginary line gets shaved, not trimmed. Shaved with the clipper or razor, not faded, because a soft transition there reads as a lazy line in daylight.
Use your trimmer with no guard, held upside down so the blade faces away from the beard you are keeping, and sweep from the bottom up to the line. Two curved points on each side of the neck should connect behind the jaw, never straight across the front. Conrad’s tutorial demonstrates this placement on camera, and it is worth watching once before your first attempt because the line reads differently on every face.
Barber tip: never trim the neckline freehand. Map it with two curved points above the Adam’s apple, connect them behind the jaw, and sweep upward with no guard. One over-eager pass is how a two-week beard becomes a one-week beard.
Set the Cheek Line With Restraint
The cheek line should follow your beard’s natural growth edge, cleaned up by a few millimeters at most. Fighting your growth pattern to manufacture a lower cheek line creates the drawn-on look that barbers quietly fix at the next appointment. Hold your trimmer vertically, use short flicking strokes from the bottom of the line upward, and remove only the strays that sit clearly outside the natural edge.
For the crisp line itself, a detail trimmer with a T-wide blade makes the difference between “tidy” and “sharp.” The Wahl Professional 5 Star Cordless Detailer Li is the trimmer barbers keep at their station for exactly this work: its extended T-wide blade covers a cheek line in fewer, straighter passes, the zero-overlap edge tracks close without nicking, and the 100-minute lithium battery means the tool is always ready when you are. It also handles the neckline sweep from the previous step without swapping tools.
Two-Pass Length Reduction, Not First-Try Hacks
Only after both lines are mapped do you touch the length. Comb the beard downward and trim across the grain with your trimmer guarded, one guard length longer than your target, then step down. This two-pass approach protects you from the classic error of hitting the target length in one pass and finding a divot on one side ten minutes later. Trim the underside of the chin less aggressively than the front: from the mirror’s perspective, most men’s beards read long at the chin and short at the cheeks, so the cheeks carry more of the reduction.
Check symmetry continuously with a comb held horizontally under the chin as a guide rail, and turn your face 45 degrees to each side every few minutes. Symmetry errors come from trimming while facing straight ahead, which flattens your perception of the sides.
Finish With Oil, Balm, and a Cold Rinse
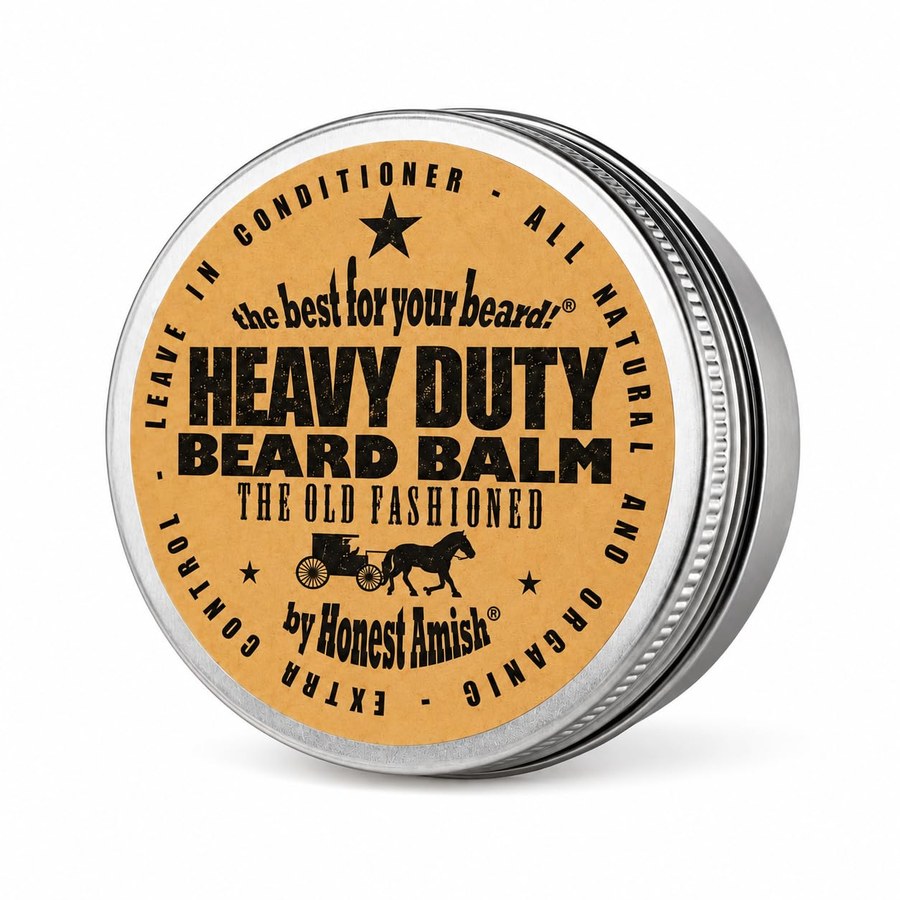
A shaped beard needs conditioning the day of the trim. Warm-water rinse, pat dry, then a few drops of beard oil worked from the skin outward. For beards past an inch in length, a balm adds light hold that keeps the shape you just built from collapsing under a jacket collar. The Honest Amish Heavy Duty Beard Balm is the standard-bearer here: a beeswax-forward formula with shea butter that softens coarse growth while keeping the silhouette where you set it, and a little goes a very long way at the two-ounce size.
The weekly rhythm matters more than any single trim. Wash and condition two to three times a week with the Suavecito set, reshape the cheek and neck lines every four to seven days, and do the full length reduction only when growth actually demands it. Beards reward maintenance schedules the way lawns do: small, frequent passes beat one drastic cut every time.
Shop note: put the schedule on the calendar like a haircut: cheek and neck cleanup every two to three days, full reshape every four to seven. The beards that always look barber-maintained follow a rhythm, not a mood.
The Three Mistakes That Ruin Good Trims
- Trimming damp. Hair shrinks as it dries, so a damp trim ends up shorter than planned. Dry only.
- Neckline too high. Keep the line at the Adam’s apple boundary. When in doubt, stay lower.
- Chasing symmetry in one pass. Build both sides in alternating light passes rather than finishing one side completely.
Give yourself three trim cycles to get the framework down, and use a two-mirror setup, one in front, one behind, for the first few. For tool deep-dives, our beard trimmer guide for every budget breaks down the full market, our Andis T-Outliner review covers the classic liner many barbers still swear by, and the men’s styling guide covers what to do with the hair above the beard.
Adjustments for Long Beards and Mustaches
Beards past two inches need the framework bent, not replaced. Map the neckline exactly the same way, but skip the guarded bulk-reduction step entirely and use scissors over comb instead, lifting small vertical sections and trimming parallel to the comb. Clippers with guards struggle at long lengths because the guard drags through dense growth and produces a stepped, chewed look that reads as DIY from across the room. Scissor-over-comb also lets you preserve the taper from chin to cheek that makes a long beard look intentional.
The mustache gets its own line, and it is the same discipline: define the lower boundary at the lip line, then trim vertically with small scissors rather than a guarded trimmer, which compresses the mustache into a flat block. Snip from the center outward, checking each side against the other, because mustache asymmetry is the fastest way to make an otherwise sharp trim look rushed.
Keeping the Shape Between Trims
The lines you set do the daily work. Cheek and neck edges need a sixty-second cleanup every two or three days with the detail trimmer, no length change, just the strays outside the mapped lines. That single habit is what makes a home beard program look barber-maintained, and it is why the trimmer you buy matters more than the clipper in your drawer. A dedicated detail tool like the Wahl Cordless Detailer Li earns its shelf space through that cleanup routine alone.