As an Amazon Associate, TrustedBarber earns from qualifying purchases.
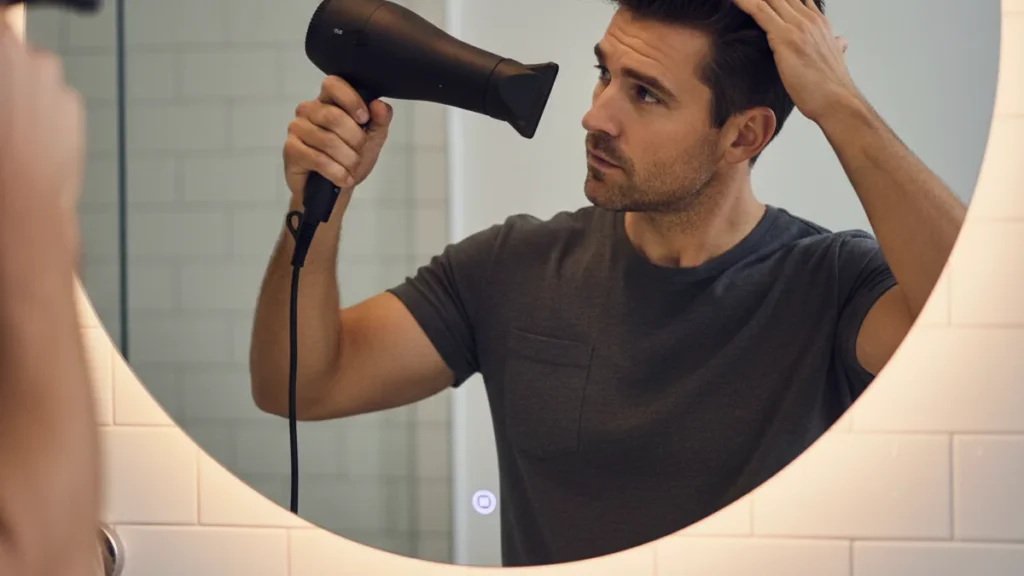
Blow drying is the step that separates hair that sits flat from hair that has actual shape, and the technique matters more than the price of the dryer. Rough dry to eighty percent, direct the airflow, work the roots first, and finish cool. This guide builds on Alex Costa’s blow dry tutorial and turns the job into a short routine that works with any decent dryer.
Before any of it, one habit is non-negotiable: heat protectant. A spray like CHI 44 Iron Guard on damp hair costs about $5-10 a bottle and is the difference between daily blow drying and slow-cooking your hair.
Top picks
Check Price on the BaBylissPRO Portofino Dryer
Check Price on the ghd Helios Dryer
In this guide
Why blow dry at all
Air-dried hair dries in whatever direction it fell, which for most men means compressed flat against the head. A blow dryer lets you set direction and lift while the hair is still soft enough to accept it, and the set holds all day. It also matters for men who use any product with hold: clay, paste, and pomade all grip better on dry hair with a bit of texture than on damp, flat hair, so the blow dry is really the foundation step for the whole style.
There is a hair-health angle too. A 2011 lab study in the Annals of Dermatology (Lee and colleagues) compared drying methods on hair strands. It found that a dryer causes more surface damage than natural drying, but that using one at 15 cm (about six inches) with continuous motion caused less damage than letting hair dry naturally. That distance-and-motion rule is the one this guide uses.
The habit fails when men dry on high heat at close range with no protectant, every day. Done right, daily blow drying is not damaging; done carelessly, it is. The protectant step and the distance rules below are what keep it on the right side.
Alex Costa’s method
In the video’s description, Costa calls it a men’s blow-drying tutorial, says he only learned to blow dry a few years before making it, and says the whole thing takes less than ten minutes. He finishes with a texture clay. Use the video for the hand positions; the written routine below is this guide’s version, in this order: towel blot, protectant, rough dry with fingers to about eighty percent, directed drying with a brush for the final twenty percent, root lift, then a cool shot to lock the set.
Two habits make the difference in any blow dry: the dryer keeps moving instead of parking on one spot, and the brush only goes where you want height. Both are easier to copy from watching someone do it than from reading about it.
One more detail worth copying: for a smooth finish, point the airflow down the hair, from root to end. Pointing it up into the hair gives lift, and usually some frizz along with it, so save that for the roots you want standing.
Choosing the dryer and the brush
For a daily driver, the BaBylissPRO Nano Titanium Portofino runs about $140-160. BaBylissPRO lists a 2,000-watt Italian AC motor, an ionic generator, six heat and speed settings and a removable rear filter.
Check Price on the BaBylissPRO Portofino
The step-up pick is the ghd Helios, about $300-350. ghd lists a longer-life brushless motor and internal aerodynamics that it says push air at 75 mph, plus ionic frizz control. Our hair dryer roundup covers the full field at every budget.
Check Price on the ghd Helios Dryer
The brush matters as much as the dryer. A vent brush or round brush lifts at the root; a boar bristle brush smooths and directs. For short-to-medium cuts, a boar brush such as the Diane 7-Row Boar Brush (sold as a 100% boar bristle wave brush for fine to medium hair) works as a daily driver, and the blow dry becomes a directed pass rather than a scrub.
Check Price on the Diane 7-Row Boar Brush
Heat protection, done right
Protectant goes on before any heat, every time. CHI’s directions for CHI 44 Iron Guard are to section the hair and spray it evenly before the heat tool, and they say it can also go on wet hair before drying, which is the version this routine uses. Work it through with your fingers or a comb so it coats rather than pools, then start drying.
Skip it on the days you skip the dryer; one heat product plus your normal routine is plenty. If your hair is coarse and drinks product, a second light pass at the roots is fine. The point is timing: it goes on before the dryer starts, which is where CHI’s directions put it.
Check Price on the CHI 44 Iron Guard
The routine, step by step
1. Blot, never rub. Towel the hair until it is damp, not dripping. Rubbing roughs up the cuticle and creates the frizz you are about to spend five minutes fixing.
2. Protectant, then rough dry. Spray, work it through, then blow dry with your fingers on medium heat and high speed, lifting at the roots and keeping the nozzle moving. Stop at about eighty percent dry; the last twenty is where styling happens, and it needs the hair slightly damp to reshape.
3. Direct the front. Point the airflow back and to the side as you dry the front section, using your fingers or the brush to hold the hair where your finished style wants it. The front sets first because it is what you and everyone else sees first.
4. Root lift. For volume, lift sections straight up from the scalp with the brush and hit the root with air for two or three seconds, then let it cool before releasing. Roots remember the shape they cool in, which is why the cool shot exists.
5. Cool shot and finish. Flip to cool for thirty seconds across the whole head, then style. The cool shot locks the direction and adds the shine; warm-set hair that cools under a hat loses the set in an hour.
Volume tricks that actually work
Dry against your natural growth for volume: if your hair falls forward, dry it up and back. If it falls back and flat, dry it forward and to the side first, then flip it back at the end. The trick is the final flip, and it only works if the hair dried in the opposite direction first.
A texturizing product multiplies the lift. The real partner here is what you apply after: our styling product guide ranks matte clays and powders for post-blow-dry volume, and our pomade versus clay breakdown covers which holds which shape.
Crown swirls need patience, not pressure: dry the crown in a star pattern, four directions from the center point, so the swirl flattens instead of standing. Fight it with the brush against the growth for the last pass, then cool shot.
Finishing and the products after
Style on fully dry hair. Every product with hold, from paste to clay to pomade, grips and sets on dry hair; on damp hair the same amount reads greasy and the hold fades by lunch. Warm the product between your palms, work from the back forward, and use less than you think, adding in small amounts.
If the finished shape drifts by afternoon, the fix is usually the cool shot, not more product. A thirty-second cool finish sets the shape so the product has a shape to protect rather than one to fight all day.
FAQ
Is blow drying every day bad for your hair? Not when it is done at medium heat, about six inches away, with a protectant and a moving nozzle. The 2011 Annals of Dermatology study cited above found that a dryer used at 15 cm with continuous motion caused less damage than natural drying. The trouble starts with close-range high heat on unprotected hair.
Should I blow dry wet or damp hair? Damp, never soaked and never fully dry. Soaked hair wastes minutes and overexposes hair to heat; fully dry hair cannot be reshaped. Rough dry to eighty percent with fingers, then do the styling work on the last twenty percent.
How far should the dryer be from my hair? About six inches, and always moving. The nozzle concentrates heat, so a stationary nozzle at close range cooks a spot in seconds. Distance plus motion is the whole safety rule.
Do I need an ionic dryer? It helps, it is not essential. Ionic output mainly addresses static, so hair is less flyaway while it dries. Technique and a protectant do more for the result than ions do, but pro-tier dryers like the BaBylissPRO Portofino and the ghd Helios have it built in anyway.
Which nozzle should I use? The flat concentrator nozzle is the one that matters for most men’s cuts: it narrows the airflow so you can point it, and pointing it is the whole skill. Skip the diffuser unless you have curls or waves you want to encourage; it spreads air in every direction, which is the opposite of what a short men’s cut needs.
How long should this take? On short-to-medium hair, five minutes is a fair target once the routine is muscle memory: about a minute blotting, half a minute on protectant, two minutes of rough drying, then ninety seconds of directed work and the cool shot. If it is consistently running longer, the likely cause is starting too wet; the rough dry should be finished by the two-minute mark.
Verdict: blow drying is a five-minute skill with a one-purchase payoff: blot, protect with CHI 44 Iron Guard, rough dry, direct, lift the roots, cool shot. Run it for a week and the mirror will tell you the rest.