
Disclosure: this article contains affiliate links. As an Amazon Associate, Trusted Barber may earn from qualifying purchases, at no extra cost to you.
The number 1 guard is where a buzz cut stops being “long hair, cut short” and becomes a look that reads almost shaved from across the street. It leaves just 3mm of hair, about one eighth of an inch, and it is the length most people picture when someone says buzz cut. In the tutorial embedded in the steps section below, barber David Escamilla builds a complete number 1 haircut from the first pass to the finished line up, and his method is worth copying even if you only ever cut your own head.
What a number 1 guard actually is
A number 1 guard, sometimes called a #1 guide comb or one guard, leaves 3mm of hair, or 1/8 inch, when the clipper lever is closed. That is the whole trick of guard numbers: the number is the comb, not the setting, and the comb sets how much hair survives the pass. For scale, the ladder looks like this: a #2 guard leaves 6mm, a #3 leaves 10mm, and a #1 is half the height of the #2 most people start with. The full table with every length in mm lives in our clipper guard sizes chart, and the practical differences between the short numbers are covered in our buzz cut guard numbers guide.
One detail matters at this length: the lever changes what a guard leaves. On a clipper with an adjustable lever, running the #1 guard with the lever open leaves slightly longer, softer hair than lever closed. Barbers use that half-step deliberately, which is exactly what the lever-play section below is about. If your clipper has a fixed guard and no lever, the 3mm number is simply what you get.
Key theme: The #1 guard is 3mm: the shortest length that still reads as hair rather than skin. It is a real buzz cut, but you can still see the outline of the hairline.
What a #1 buzz cut looks like, and who it suits
At 3mm the hair follows the shape of the head instead of the shape of the hair. That is the appeal and the risk. A well-proportioned head gets a clean, dense, uniform look that photographs like a professional cut; a head with a flat spot, uneven crown growth or a visible scar will show it more than it would under a #2 or #3, because there is no length left to hide it.
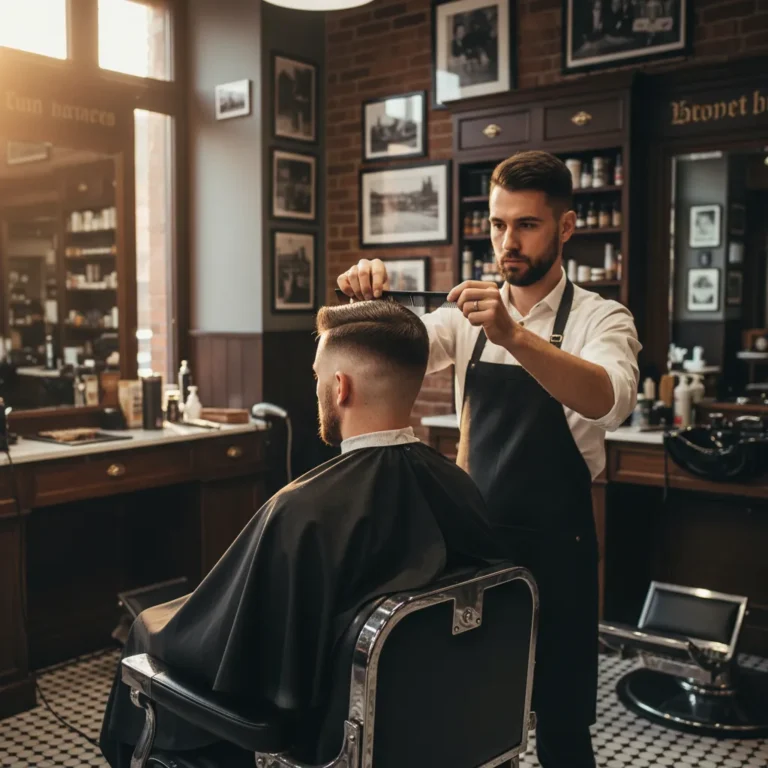
The Escamilla video is a good case study for the softer version of this decision. His client keeps a #1 on top but pairs it with a high fade, so the cut has architecture: dark on top, shorter at the sides, a defined line up at the hairline. A #1 works both ways, as an all-over one-pass buzz or as the top length of a faded cut, and the steps below cover the barber version, which teaches you more than a straight all-over pass does.
It is also a cut with a particular audience. Barbers reach for the #1 on clients with strong head shapes, on people whose hairline is starting to recede unevenly at the temples, where a slightly longer guard would make the contrast obvious, and on anyone who wants the shortest cut that still allows a line up. On the practical side: this length dries in minutes, uses almost no product, and still gives you something to line up, unlike a skin-level shave. It also grows out into a #2 within roughly a week to ten days, so a #1 buzz is a commitment of days, not months.
Key theme: A #1 shows the head more than a #2 or #3 does. If your crown whorls or your scar shows at 3mm, start at a #2 and drop later.

Video credit: David Escamilla, on YouTube. This guide follows his method step by step; nothing here is our own testing.
Step 1: take the bulk down with the #1 guard
The barber starts by taking the number 1 guard over the whole top of the head to remove the bulk, and his two instructions are the ones every DIY head-shaving guide repeats because they matter: account for growth patterns and take your time. Crowns whirl, cowlicks lift, and the front hairline grows in a different direction than the back. A rushed pass at this stage is what leaves short patches that only show up once the whole head is at one length.
Go with the grain on the first pass. The goal here is uniform length, not closeness, and with-the-grain passes leave fewer ingrown bumps on the scalp. Any corded clipper with a full set of guards handles this; the Wahl Color Pro kit below is the classic budget pick because its color-coded combs make the #1 easy to find mid-cut, and if you want a cordless pro option, our TPOB clippers review covers the current lineup.
Step 2: set one guideline with a finger of room
Because this is a faded cut, the barber sets his first guideline with soft trimmers, meaning trimmers straight out of the box rather than zero-gapped ones, from the start of the temple back to the occipital bone, the bone that protrudes at the back of the skull. The key move: he leaves a finger of room below the guideline and does not remove all the bulk there yet. That gap is his working space. Without it, you have no reference for how high the shaver and the blend should stop, and the fade line wanders.
He also adjusts for head shape explicitly: every client’s head is a different size and shape, so the guideline height flexes per person. For a DIY buzz, the same rule translates to: pick your guideline by sight in the mirror, mark it with the trimmer, and stop a finger’s width above where you plan to finish.
The tool that does this step is a detail trimmer, and the Andis T-Outliner is the standard the barber version of this step is built around.
Step 3: lever play, closed to open
This is the section that separates a blurry fade from a clean one, and the barber’s rule of thumb is worth memorizing: lever closed hits the beginning of the guideline, lever in the middle hits the middle, lever fully open hits the full guideline. He starts with the clipper closed, barely touches the bottom of the line, then opens the lever one notch at a time and hits a little higher each pass, repeating until the guideline is fully blended. Starting closed and walking up keeps you from jumping too high and losing the dark base of the fade.
Key theme: Closed = bottom of the guideline, middle = middle, open = the whole line. Walk the lever up instead of jumping to open, and the fade blends itself.
Step 4: blend with the half guard
Next he repeats the blending process with a half guard, the thin snap-on half-comb that sits between guards. His take: half guard open is almost a #1, so starting open plays it safe and conserves the darkness of the fade. The physical trick he demonstrates: press the skin down with your thumb as you blend. At these lengths the clipper struggles to catch the hair unless the scalp is held taut, and the thumb is what makes the machine bite cleanly.
If you are cutting yourself and have no half guard, do the same passes with the #1 guard and the lever, just more of them. The principle is the same: multiple shallow passes beat one aggressive one.
Step 5: erase the guideline going down with the grain
The hardest part of any faded cut is erasing the first guideline without leaving a shadow, and the barber handles it with two tools. First the trimmer, going very lightly down with the grain, only within the finger of room he saved. That saved strip is the visible guide for what he may and may not shave. Then a shaver clears the remaining bulk; he uses a Braun Series 9 for this and notes it saves him a whole pass with the trimmer.
For a home setup, a foil shaver does the same job. The Andis ProFoil below is the pro-shop version, and our guide to the best shavers for bald heads covers the alternatives at every price.
Step 6: line up center first, then the corners
For the final line up the barber works the front in a fixed order: start in the center, then the corners, then the top corner, and only then step back and check whether the whole line reads straight before any razor touches it. Razor last, never first: the trimmer sets the draft, the razor sharpens it. He also offers the honest optional step that barbers sell a lot of: hairline enhancements, in his case a semi-permanent dark brown paint sprayed lightly, with the note that on short hair you should spray as light as possible because the product stands out more than usual, then blended down with stain cleanser and a brush to look natural.
At home, the equivalent is keeping your neckline and sideburn edges crisp between cuts. The OneBlade below is the low-risk tool for that job, since its guarded blade cannot cut skin the way an open T-blade can.
Number 1 guard versus going shorter
The #1 sits at an interesting point in the ladder. Below it sits the zero gap, closed clipper-only pass that leaves roughly 1mm, and below that the foil shaver, which leaves nothing at all. Above it sits the #2 at 6mm, the length a lot of first-time buzzers choose because it is easier to fix a mistake at.
The trade is simple: the #1 is the last guard that gives you any margin for error. At 3mm, a patchy first pass is visible but correctable with a follow-up pass; at zero gap, everything you do not take down stays visible, and uneven edges are much harder to hide because the hair is too short to blend into. If you have never buzzed your own head, cutting once at a #2, checking the whole head in the mirror, then dropping to a #1 costs nothing and teaches you what your crown actually looks like. If you already buzz at a #2 and want it tighter, go straight to the #1: the method above does not change, only the guard does.
Keeping a #1 buzz fresh
At 3mm, the grow-out is fast and forgiving. Most people re-run the #1 guard over the whole head every one to two weeks to keep the length uniform, and the neckline needs a touch-up around the same interval. Because the cut is a single length, re-cutting is a five-minute job once the guideline and line-up work are handled, which is why the barber method above is worth learning even for an all-over buzz: the same lever discipline keeps your own head even.
Key theme: A #1 grows out to a #2 in about a week. A weekly five-minute re-buzz keeps the length uniform; the line up is the part that needs the trimmer.
Keeping the whole head even on your own
The barber works on a client, but the parts of his method that make the cut even translate directly to a DIY head. The finger-of-room guideline gives you a visible stopping line on the sides and back, which is where most self-cuts drift higher. The closed-to-open lever walk keeps every pass from jumping. And his explicit note to account for growth patterns is even more important when you are your own client, because you see the top of your head through a mirror, inverted.
Two practical habits close the gap. First, use the same order every time: top bulk first, then sides, then blend, then line up, so a missed spot has a known place in the sequence rather than turning up at the end. Second, check the crown with two mirrors, not one, before you call the bulk pass done. The crown is the spot every uniform-length cut hides its unevenness, and at 3mm there is no length left to cover a missed whorl.
Key theme: Same order every pass, and the mirror does the quality control. A fixed sequence turns a re-buzz into a five-minute checklist instead of a hunt for missed patches.
The short answer
A number 1 guard leaves 3mm of hair: the shortest cut that still looks like hair. It suits people who want a genuinely short buzz with visible density, and it rewards heads with clean proportions. The method, in six moves: take the bulk down with the #1, set one guideline with a finger of room, walk the lever from closed to open, blend with the half guard, erase the line going down with the grain inside your saved strip, and line up center first. If you are still deciding between lengths, our guard numbers guide puts the #1, #2 and #3 side by side, and shaving your head at home is the one-step-shorter option.