TrustedBarber is reader-supported. If you buy through links on this page, we may earn a commission from Amazon at no extra cost to you.
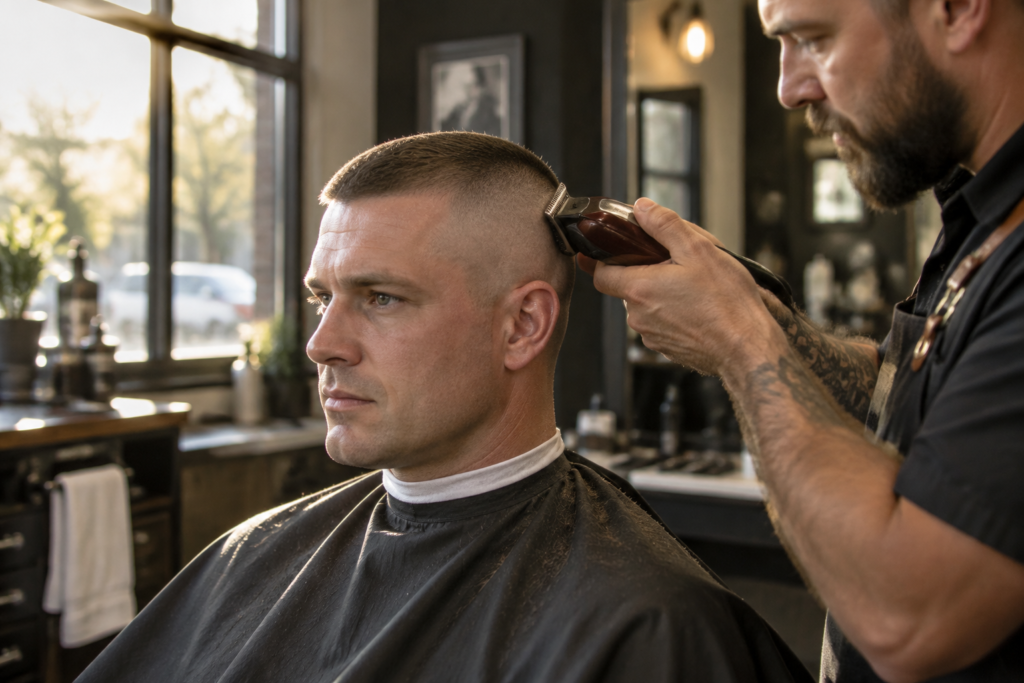
The high and tight is the strictest silhouette in the clipper catalog: tight through the back and sides, controlled on top, no softness anywhere. True North Barber Shop filmed one from start to finish, and the value is in the order of operations. Here is how a barber builds it.
Before the clippers: keep it wet
Two things happen before any guard touches the head. First, the guide on top gets set early: the barber starts his mohawk guide so the top length is decided before the sides begin. Second, he runs a leave-in conditioner through the hair before cutting, for one reason: it keeps the hair wet while he works. Wet hair cuts predictably and stays where you comb it, which matters on a cut where every line shows.
Why the top gets set first
The mohawk guide is not a styling choice, it is the measuring stick for the whole cut. By setting the top length before any side work begins, the barber fixes the proportions up front: every pass on the sides is then judged against a top that is already decided. He also treats that early guide as part of tailoring the cut to the individual head rather than following a fixed formula.
On a high and tight this order is stricter than on most cuts, because the whole look is the contrast between the tight sides and the controlled top. If the sides go in first, you are blending toward a length that does not exist yet.
The sides: set a baseline first
Here is where his method departs from the usual advice. A lot of people go straight in with a fixed guard, a one and a half or a two, depending on how dark they want the result. His approach is to set a baseline guide on the sides freehand instead, a technique he adopted after taking classes in Rotterdam. In his words it does the same job but in a more freehand way, and it tailors the haircut to the individual head in front of him. It is also a fast way to remove bulk, and he is visually double-checking the shape as he goes.
Working up to the weight line
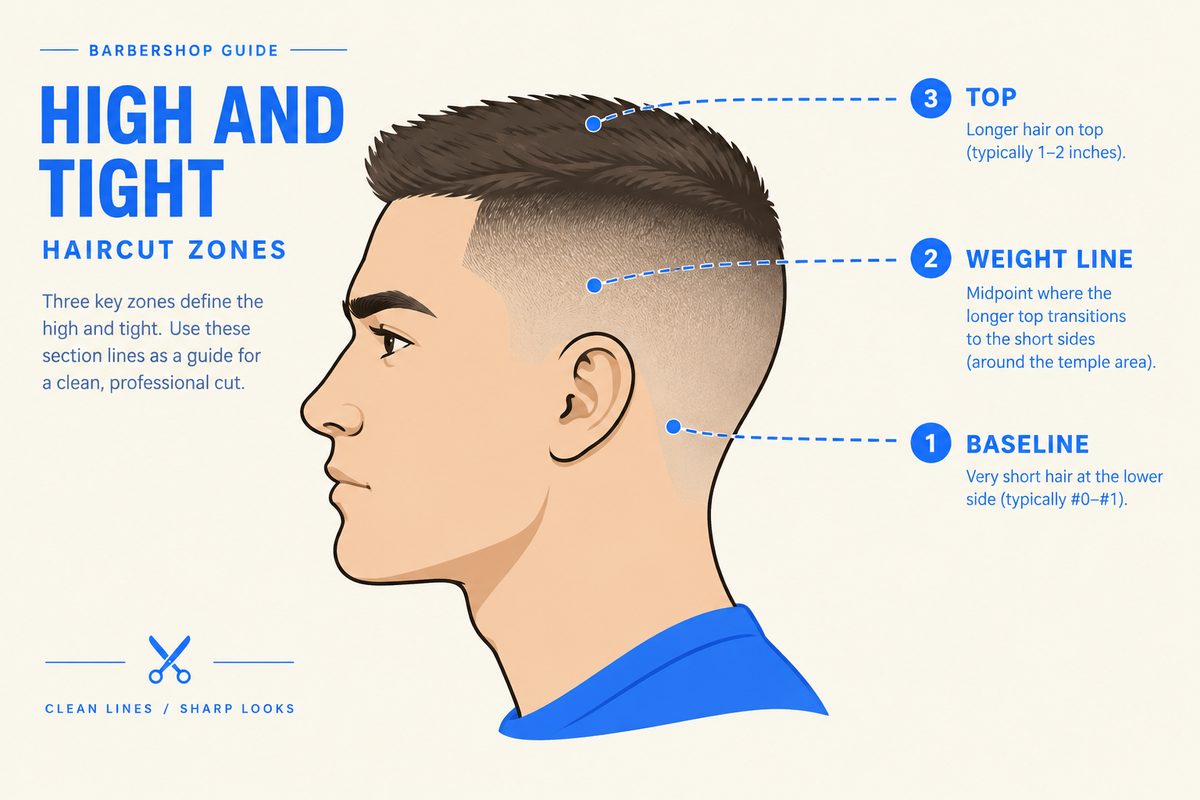
With the baseline in, he moves to the clipper with the lever open at a one and a half and brings it right up to just underneath the weight line. The technique on the way up: scooping out and flicking out at the top of each pass so he never leaves a hard line, pressure fading as he goes. Then the cross-check. He goes back over the work looking for peaks and valleys, adjusting anything that is not clean before moving on. On a cut this short, that cross-check is where the quality comes from.
More from the full cut
In True North’s full start-to-finish high and tight, the working habits around the fade get more airtime. Before any cutting, he works a leave-in conditioner through the top to keep the hair wet while he cuts it. Between passes he cross-checks constantly, looking for what he calls peaks and valleys and adjusting as he goes.
His blend has its own vocabulary. Coming up to the weight line with the lever open, he scoops out and flicks out so no hard line survives, a pressure-fading motion that lightens the blade as it leaves the hair. When he blends he works in a band of about three quarters of an inch, giving himself room to fade instead of chasing one line with one pass. To erase the bald line at the bottom, he goes in with the half guard underneath the one and flicks it shorter. And for balance he uses the mirror, pointing out that you can see things in the reflection that you cannot see right up close. One optional shape note: he lets the fade swing down in the back into a drop fade, which follows the head instead of running straight around it.
The tools True North uses
His clipper is a JRL cordless, and his reasons are practical. He cites roughly four hours of battery life, a small battery indicator on the body, and a newer motor design that runs quieter than older clippers, which matters in a shop all day.
His shear is a six-inch Mitsutani, a Japanese brand he says is known for keeping its edge longer. It costs more than average, and his verdict is that you get what you pay for. He calls six inches a good length for lots of different work: long enough for scissor over comb on the sides, still nimble enough for cutting through the top.
The home kit
For shears, his pick is a six-inch shear, which he calls a good length for lots of different work, from scissor over comb to cutting through the top. For home use, the Equinox Professional Razor Edge shears cover that same ground.
Check the Equinox shears on Amazon
For the clipper work, you want a lever that opens and closes smoothly, since the method leans on lever play for the fade. The Wahl 5 Star Magic Clip is built for exactly that style of blending, and a carbon cutting comb handles the lifting and cross-checking.
Check the Magic Clip on Amazon
Watch the full cut
Video credit: True North Barber Shop on YouTube.
Where the high and tight fits, and who it suits
The high and tight rewards a strong head shape, because with that much of the head exposed there is nothing to hide behind. Oval and square head shapes carry it best; a rounder head shape can still wear one, but the barber should leave a touch more height on top so the silhouette gains the vertical line the sides remove. On hair type, the cut is genuinely egalitarian: it works on straight, wavy, and coiled hair alike, because the top is short enough that the natural texture mostly decides how the top stands rather than whether the cut holds its shape.
It is also the best answer in the short-cut family for men whose hair grows in two directions at the crown. There is so little length involved that a crown whorl cannot create the forked look it produces on a grown-out style. If you have ever been disappointed by how a crew cut showed your growth pattern, the high and tight removes the problem by removing the hair.
The maintenance reality
This is a cut you live with on a schedule. The silhouette depends on contrast, and contrast decays from the sides first: the faded zone blurs within about a week, and by week two the whole cut reads softer. Most men who keep one book the sides every one to two weeks and let the top ride until it starts to poke past its shape. The neckline and the edge around the ear matter just as much between visits, because a clean silhouette with a fuzzy nape defeats itself; the two-minute cleanup in our neckline cleanup guide is the fix between full cuts.
Between cut days, the upkeep is washing and a leave-in. Because the top is worked while wet in the chair, keeping it conditioned at home preserves both the look and the ease of the next cut. A dry, unconditioned top on a high and tight stands up in random directions and makes the next barber’s job harder.
Common mistakes when cutting it at home
- Starting the sides too high on the first pass. Set your baseline low and work up in bands. The method above depends on building to the weight line; starting at the final height on pass one leaves nothing to blend with.
- Skipping the cross-check. The peaks-and-valleys pass is where home cuts separate from shop cuts. Check from the front, both sides, and behind, using a second mirror.
- Letting the top length drift. Because the sides are so tight, every extra millimeter of top reads twice as loud. Keep the top consistent with the length you chose at the start, or shorten the whole silhouette together.
- Ignoring the temple corners. A high and tight frames the face from the temples down, and an untrimmed corner softens the entire look. Finish the edges with a trimmer, dabbing lightly rather than dragging.
- Cutting it dry. Wet cutting is the backbone of the method; a dry cut on hair this short misleads you about the finish you are actually leaving.
How it compares to the cuts around it
If you are choosing between the short cuts, the differences come down to contrast and upkeep. The buzz cut is the zero-contrast version: one length all over, minimal skill, and the look in our buzz cut guard numbers guide explains exactly what each guard length gives you. The crew cut keeps more blending and a touch more length everywhere, which buys forgiveness at the cost of a softer statement. The high and tight is the sharp end: hardest contrast, strictest upkeep, strongest silhouette. And when the sides need to fade into skin rather than stop at a short guard, the mechanics of the blend are the same ones covered in our taper versus fade explainer and, for the skin-tight version, our burst fade guide.
Guard numbers matter on every one of these cuts, so when a video or a barber says “one and a half,” knowing what that actually leaves is worth two minutes: our clipper guard sizes explainer covers the whole scale.
Thinking about cutting it yourself
The high and tight is one of the more realistic self-cuts precisely because the sides are uniform: there is no long-to-short artistic blend across a large zone, just a tight baseline, a weight line, and a controlled top. The full at-home workflow, including mirror setups and section order, is in our cut your own hair with clippers guide, and our home clipper roundup covers the tool options at every budget. The one part worth practicing before you commit is the edge work around the temples and ears; the discipline involved is the same one our hairline lineup guide covers for full lineups.
How often should a high and tight be redone?
Every one to two weeks keeps the contrast that defines the cut. At three weeks the sides have grown enough that the silhouette reads as an ordinary short cut rather than a high and tight.
Can a high and tight work with a beard?
Yes, and the pairing is strong when the beard is kept structured: the shaved-tight sides extend visually into a clean beard neckline if the transition is maintained. Keep the beard’s cheek line deliberate so the head and beard read as one shape rather than two competing ones.
Does a high and tight work on thinning hair?
It is one of the better options, because the short top removes the length that makes thinning visible. The broader strategy for thinning hair, including when to go shorter or embrace the shave, is covered in our receding hairline style guide.
What guard is a high and tight?
There is no single answer: the method above sets a freehand baseline and works up to a weight line with lever play, which is how barbers tailor it. A common starting point at home is a one or one-and-a-half on the sides with the top set by guide or scissor, adjusted to the head in front of you.
FAQ
What is pressure fading?
True North’s term for lightening the clipper as you reach the top of a pass: you scoop and flick the blade out as it approaches the weight line so it leaves no hard line, rather than cutting the same pressure all the way up.
What is a high and tight haircut?
A military-born cut with very short back and sides taken high up the head and a short, controlled top. The contrast is sharper than a crew cut, with the sides sitting high and tight against the head, which is where the name comes from.
How is a high and tight different from a crew cut?
The crew cut keeps a tapered, blended side with a little more length everywhere. The high and tight takes the sides much higher and much shorter with a harder line between the sides and the top. If you want the softer option, our crew cut guide covers that method.
Why keep the hair wet while cutting?
Wet hair cuts predictably and stays where you comb it. True North runs a leave-in conditioner through the hair before cutting for exactly that reason, which keeps every line honest on a cut this short.
What does flicking out at the weight line mean?
It is how he avoids a hard line. On each pass up toward the weight line, he scoops out and flicks the clipper away from the head at the top of the stroke, so the hair gets gradually shorter instead of ending in a step.