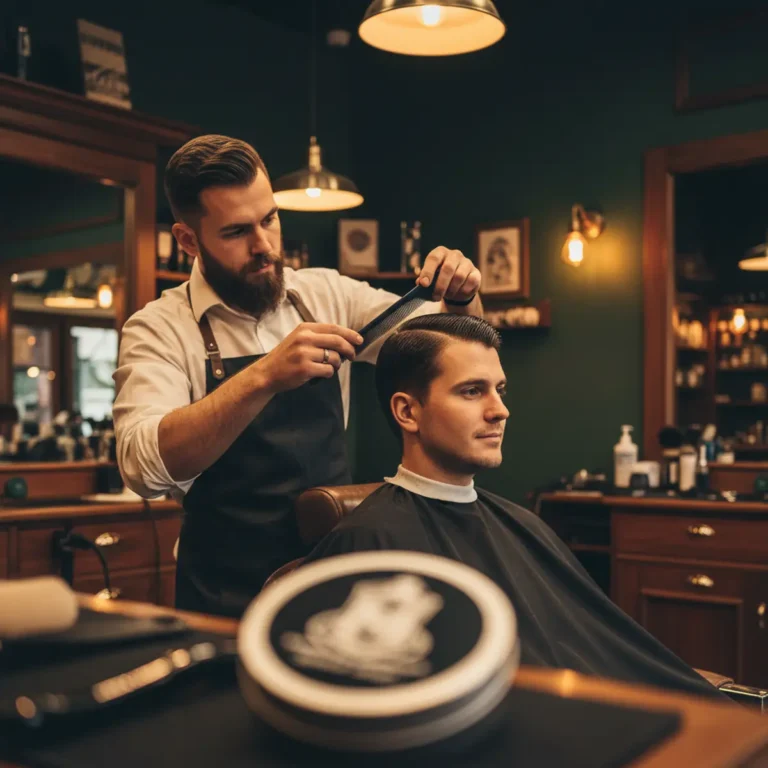
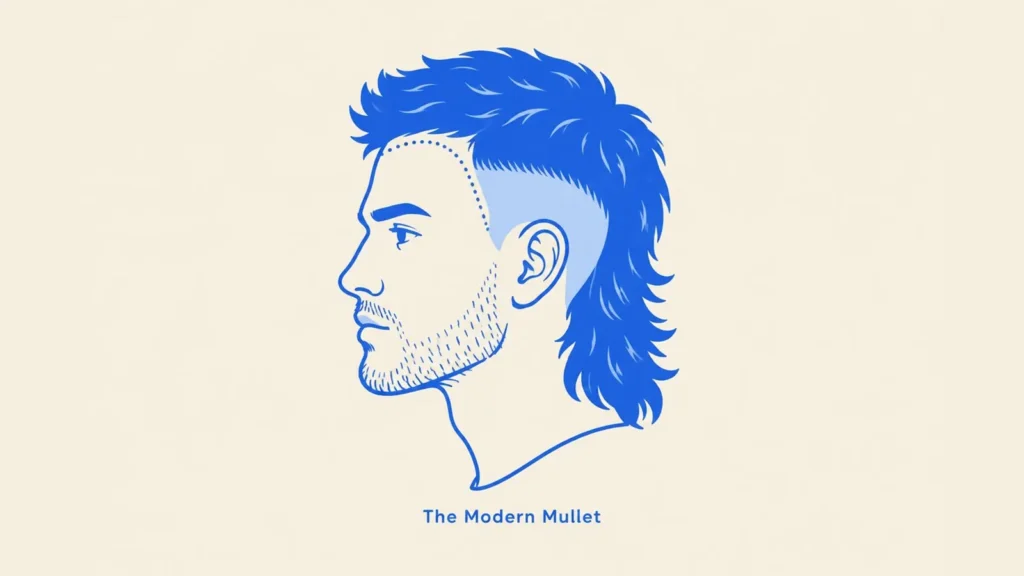
The mullet has come back, but not the one from the eighties. What clients are asking for now is a modern mullet: shorter, textured at the back, built for flow instead of party-in-the-back exaggeration. Barber David Falla filmed a complete tutorial of exactly that cut, and what makes the video worth studying is not the silhouette but the system behind it. Every section connects to a guide from the previous section, so the whole head is built from one continuous reference chain. Here is that method, step by step.
The kit is standard barber station fare: a solid clipper for the guard work, like the Wahl 5 Star Magic Clip, a detail trimmer for the edges, and a texturizing product for the finish.
What Makes a Mullet “Modern”
Falla sets the brief at the start: nothing too extreme. The client wants something more natural and flowy, in line with where a lot of cuts are trending. People are moving away from skin fades, at least in his area, and the modern mullet reflects that: the back is quite short and textured rather than flicking out dramatically, the sides stay softer than a skin fade would leave them, and the whole cut reads grown-in rather than carved.
That matters because it changes the technique. A skin-fade mullet is built with clippers and contrast. This one is built with scissors first and clippers only to connect and clean up, which is why the layering work carries so much of the result.
Key theme: the modern mullet is a scissor cut that clippers finish. If you lead with the clippers, you lose the flow that defines the style.
Prep: Wet It Fully and Map the Cowlicks
The first move is a full wet-down, roots included, because dry hair lies about where it wants to go. Then comes the step most home attempts skip: mapping the growth patterns. Falla parts the hair right down the center, and immediately flags the cowlicks. This client has one at the front and one at the side, and he treats them as information rather than obstacles. Separate all the cowlicks so you know exactly what the hair wants to do, then section around them instead of fighting them.
The sectioning follows the growth map: a center part, then a section from the back cowlick across to behind the ear, then another from there up to the recession area at the front. Numbering the sections is his explicit recommendation, because the rest of the cut depends on finding each section’s partner later.

The Back: Flat Layers at Ninety Degrees
He starts at the back because it is the biggest surface and, in his opinion, the easiest to get right first. The core technique lives here. Take the center section at the back, and pull the hair ninety degrees from the head before cutting. That single angle is what creates what he calls flat layers or square layers: when you pull a whole section straight out and cut it square, it forms a straight line across the section instead of a curve.
The ninety-degree square cut does two jobs at once. It maintains length toward the top as the head rounds, and toward the nape at the bottom, while reducing weight where the bone pushes out, the spot where mullets usually go heavy and bulky. That weight removal is what lets the hair move instead of sitting like a block.
Key theme: ninety degrees is not a style choice, it is the mechanism. Square layers cut at that angle are what turn a heavy back into a flowing one.
Matching Sides: Sections to the Center
Section two pairs with section one, and the pairing rule is consistent through the whole cut: pull both sections to the center and cut to the guide you created. He combs hair from one side and the other so both meet in the middle, then cuts against that shared reference. The reason is deliberate: cutting to a rounded, horizontally soft shape is what produces the movement and texture at the back that the modern mullet is named for.
Two tips ride along with this step. Keep the hair wet the entire time, because dry strands stretch and lie about their true length. And count your sections: if you had five sections on one side, you should have five on the other. The count is the simplest quality check in the whole method.
Checking the Perimeter and the Balance
Before moving on, he audits his own work. First the perimeter at the bottom of the cut, cut to a straight line so the hair flows evenly. Then the balance check: grabbing small pieces from each side, verifying they are even and well matched, and moving the hair around to see how it falls. His standard here is worth quoting because it applies to every cut on this site: follow every technique you want, but visually it needs to make sense. The system gets you close; the eye finishes the job.
Sides Into Top: Building the Graduation
The sides connect to the back through a section that spans both, and here the geometry changes. The side sections angle diagonally, and that diagonal is doing real work. It creates a graduation, meaning the hair goes from shorter at the bottom to longer at the top, a triangle shape. It also gives the hair direction, pushing it forward, which is exactly the direction the cut is heading.
Once one side is done, mirror it. The graduation on both sides is what makes the top and the back feel like one haircut instead of two zones taped together.
The Top: Same System, Longest Piece as Guide
The top repeats the back’s logic with one new detail. Take a section from the back of the top, pull the hair all the way up and forward, and the longest piece in that section becomes the guide for the whole top. From there, vertical sections across the top, each pulled to meet the previous guide at the center, cut the same way the back was cut. As Falla puts it while working: everything connects with everything. Because every step used the previous step as its guide, the entire head holds together without re-measuring.
Key theme: one guide chain, zero re-measuring. Each section references the last, which is how the cut stays balanced front to back.
Clippers Come Last: The Soft Guard Fade
Only after the scissor work is complete do the clippers come out, and the sequence is the clever part. The client wants natural, so the sides start at a number four guard, chosen because it connects beautifully to the shorter end of the scissor graduation. From there it walks down: a one-and-a-half connecting to a three, the three back to the one-and-a-half, producing a soft fade on the sides. Light enough to see the transition, short enough to clean the silhouette, nowhere near a skin fade.
Trimmer work stays just as conservative. The client did not want anything sharply defined, so Falla shapes the sides by following exactly where the hair grows instead of pushing the line back. Around the ear gets a shape-up; the nape is left natural to keep the flow. Even the sideburn bottom stays soft. On this style, aggressive edges are the enemy.
For the clipper work, the Wahl Magic Clip covers the guard range comfortably, and the Wahl Detailer corded trimmer is the tool for the ear-area shaping, with an adjustable T-blade that stays controllable on soft lines.
Finish: Blow-Dry and Texture
The blow-dry keeps the sides textured and natural rather than slicked, and the finish is a small amount of clay worked through. Falla uses a clay for exactly this finish, and the principle transfers to any matte, pliable product: you want the texture to read as the hair’s own, not as product. Reuzel Green Grease Pomade lands in that territory with a medium hold and low shine, or for a drier matte finish the Baxter of California Clay Pomade is the barber-station standard.
The closing observation from the video explains why this cut is spreading: clients want hairstyles that move and flow, and they are actively steering away from the harder urban, skin-fade look. The modern mullet, done with this section-and-guide method, is what that preference looks like in the chair.
The System: Every Section Becomes the Next Guide
Watch the video closely and the real lesson is the order of operations, not any single cut. Falla starts at the back because it is the biggest surface to work, and the first center-back section becomes the guide for everything after it. Each new section gets pulled to meet the previous one at the center, so the guide is always a section that is already cut. The sides work the same way: pick a section you can see the finished back through, and cut to it. The top takes its guide from the longest piece pulled straight up from the back.
The discipline rules that keep the system honest are small. Keep the hair wet the whole way through. Take small sections. Number them: five sections on one side means five on the other, so the two halves stay in lockstep. And when the cutting is done, the check is visual as much as technical: run the perimeter to a clean line, grab little pieces from both sides to confirm they balance, then move the hair around and look at it the way the client will.
His framing is worth keeping whole: if you work a system, everything connects, because you are always cutting against a guide the previous step created. That is why a mullet this layered never looks accidental even though the finish is soft.
Key theme: the mullet looks improvised and is not. Every section cuts against the one before it, and that is what keeps the shape balanced.
Styling a Modern Mullet Without Fighting It
The softness is deliberate from the clippers in. The client asked for natural and flowy, and skin fades were the thing he wanted to avoid, which is why a number four guard matters here: it connects to the scissor work instead of interrupting it. The graduation built into the sides, shorter at the bottom and longer toward the top, pushes the hair forward, so the cut itself is already styling in the right direction before any product touches it.
At home, the ask is the same: hold without stiffness, low shine, texture that moves. On towel-dried hair, a matte clay with medium hold is the right tool for this shape; {link(“B000MIKEZQ”,”Baxter of California Clay Pomade”)} is the standard pick for exactly that finish. Work it through with fingers rather than a comb so the layering stays broken up, and blow dry forward and down to keep the flow the cut built. Heavy pomades and high-shine gels do the opposite of what this cut is doing.
If you want to see how the guard work differs from a harder edge, our breakdowns of the three-step drop fade and the best clippers for fades cover the contrast well: a modern mullet borrows the connection points and skips the crisp line.
Key theme: a modern mullet is styled to move. Product choice is about keep-it-soft hold, not control.
Why Natural Beats Skin Fades Right Now
Worth naming from the video itself: the client did not just want a softer mullet, he wanted out of the hard-edged look entirely. Falla says people are staying away from skin fades a lot right now, especially where he works, and this cut is the answer to that brief. Nothing in it relies on a razor line or a zero gap. The sides drop to a number four, the scissor work carries the shape, and every transition is built to look grown rather than machined.
That brief explains several choices that would look odd on their own. The flat layers at the back exist to keep length while removing the heavy weight that sits over the bone. The horizontal round shape he cuts toward exists to create movement instead of a stacked profile. The number four exists to connect to the graduation instead of interrupting it. Each decision serves the same goal: a cut that reads relaxed on day one and still reads relaxed a week later.
For readers weighing the two directions, our comparison of where low, mid and high fades each stop shows how much the fade height changes the feel of a cut, and the wolf cut razor method is the other end of the texture spectrum.
Key theme: the modern mullet is part of a wider turn away from hard edges. Every soft choice in it is answering the same brief.
Related Reads
The guard numbers in the fade here are covered in depth in our clipper guard size guide, and the layering logic borrows from the same school as the wolf cut method. For the wider context on where fades stop and why, see low, mid and high fades explained, and if you are weighing products for the finish, pomade vs clay vs wax breaks down the hold and shine choices.